Troubleshooting Unhatched Chicken Eggs: Common Causes and Solutions
Why are my chicken eggs not hatching?
The article was first published at backyardchickenscoop.com
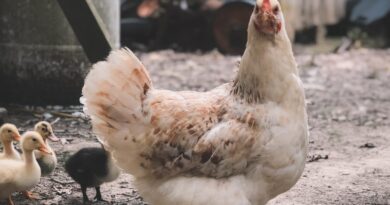
Hatching your own chicken eggs can be more fun and exciting than picking up chicks from a store. It gives a tremendous experience to choose the eggs, incubate and track them to develop into fully grown chicks.
But, not all eggs hatch into a perfect chick. There are many reasons for the chicken eggs not to hatch. The following guide provides you with the various causes for your eggs not hatching. You will also understand the reasons why eggs stop developing and how to check if an unhatched egg is alive or not.
In this article, I will go through the following:
- What Causes Chicken Eggs Not To Hatch?
- Infertile Eggs
- Immature Breeder
- Immature or pullet eggs
- Undeveloped Egg
- Dead Embryo
- Inadequate Ventilation
- Inadequate Egg Turning
- Full Embryo Dead In Shell
- Chicks Smeared With Albumen
- Chicks Stuck In A Shell
- Why Do Chicken Eggs Stop Developing?
- Bacterial Infection
- Rigorous Vibration
- Deficiency of Nutrients
- Immature Embryo
- Choice of Nature
- How do you know if an unhatched egg is alive?
- How long do you leave unhatched eggs in an incubator?
- Can the chicken eggs hatch earlier or later than 21 days?
1. What Causes Chicken Eggs Not To Hatch?
You may be disappointed to see the chicken eggs fail to hatch even after incubating for weeks. When you know the reason for the eggs not hatching, you can prevent these issues in the future and get more successful hatch rates.
a. Infertile Eggs.
Infertile eggs are the primary cause of your eggs not hatching. Infertile eggs result from immature male or female chickens. It could also be from males with abnormal sperm or females with abnormal eggs.
Infrequent mating due to improper male-to-female ratio can lead to infertile eggs. Extreme weather conditions affect the formation of fertile eggs in the breeding stocks. The weather should neither be too hot nor too cold to form the fertile eggs.
Nutrition deficiencies and incorrect feeding of chickens can also lead to the formation of infertile eggs. Certain drugs or using pesticides on the crops that are fed to your chicken can be another reason for the breeders to lay infertile eggs.
The occurrence of diseases or infestation by parasites affects the breeders’ mating pattern. It leads to the laying of immature and infertile eggs.
b. Immature Breeder.
Breeder cock needs to be mature and in good health. Very young or old cocks have abnormal sperm count. This abnormality in their sperm count prevents strong, healthy and fertile eggs. Your breeder cock should be mature and have a nearly similar age to the hens.
Moreover, the hens in the breeding flock need to be mature and in good health to lay a sound and fertile egg.
c. Immature or pullet eggs.
The eggs selected for incubating should be in an even shape and normal size with a strong outer shell. The first few eggs of a young hen also called pullet eggs are not recommended. They are smaller and immature eggs than those eggs that are laid later. The eggs from very old flocks have a high degree of infertility. These types of eggs are not suitable for incubating and yield low hatching rates.
d. Undeveloped Egg.
Fertilized eggs with long storage periods or stored in extreme temperatures may destroy the live embryos inside the egg. Such eggs hatch with limited success and may not develop into a chick.
The eggs chosen for incubation need to be handled with care during transportation. Rigorous handling of eggs results in intolerable vibrations that destroy the embryos inside the eggs.
When the incubation temperature is too high, it prevents the development of the chick inside the egg or reduces the hatch rate. Sometimes it dries up the liquid albumen inside the egg by heavy water loss.
e. Dead Embryo.
A dead embryo inside a fertile egg does not hatch when the eggs are stored or incubated in extremely high or low temperatures. It kills the embryo of the egg and forms an infertile egg.
Rigorous handling of eggs during transportation, nutritional deficiencies or diseases in the breeder flock can also cause a dead embryo.
f. Inadequate Ventilation.
The eggs under incubation need proper ventilation for the embryos to nurture and grow. The incubator needs adequate ventilation to allow enough oxygen for embryos. The ventilator should let out the released carbon dioxide to allow fresh air to flow in.
g. Inadequate Egg Turning.
The inadequate or infrequent turning of eggs causes the embryos to get destroyed. The inappropriate turning of eggs leads to improper positioning of the embryo which leads to its death. You need to take the utmost care and caution while turning the eggs. It is preferable that you know how and when to turn the eggs.
Egg turning prevents the sticking of the embryo to the inner cell membrane. It stimulates the sub-embryonic fluid and yolk formation. The hatching of fertile eggs is significantly better in eggs that are properly turned. It is not necessary to after 15 days of incubation.
h. Full Embryo Dead In Shell.
Maintaining a low humidity or low temperature in the incubator for a long period causes the fully grown embryo to die within the shell. Under these conditions, few embryos die even after they pip out of the egg.
High temperatures during the hatch, nutritional deficiencies and inadequate turning during the first 12 days of incubation also cause the embryo to die. Your eggs may not hatch without the proper turning into a full-grown embryo. The eggs need to be turned within the allowed frequency and time.
i. Chicks Smeared With Albumen.
Large eggs have high liquid albumen inside the eggs which gets slowly evaporates during incubation. When the humidity is high, it prevents the evaporation of the albumen leaving more water in the eggshell. This causes the chick to drown in the liquid in the shell. You can find a dried coating of albumen in the nostrils and beak that indicates death due to drowning.
It is important to maintain proper humidity levels during the hatching time. Low humidity after the chick pips can stop the hatching process and prevent it from further growing which causes the chicks to die.
j. Chicks Stuck In A Shell.
Poor quality or a cracked eggshell causes the chick to dry and get stuck in the shell. The weak outer shell allows easy evaporation and quick drying out of the liquid albumen inside the egg. Low humidity during incubation may further add to the drying up of the cracked eggs.
A cracked eggshell gets stuck to the chick and causes it to die. Sometimes a little intervention by wetting the dry regions with spray or a wet cloth might help to remove the stuck eggshells.
2. Why Do Chicken Eggs Stop Developing?
There are many reasons for the fertile embryos to stop developing into full-grown embryos. It primarily depends on the health and maturity of the eggs that can prevent such hindrances.
a. Bacterial Infection.
Bacterial infection of the eggs can occur if the eggs or the incubator are kept dirty. Bacteria transmits from the unclean surfaces into the egg. An unclean manual turning and candling also lead to bacterial infection and affect embryonic growth. You should ensure to have clean and spotless incubating equipment and wash your hands before turning off the eggs.
b. Rigorous Vibration.
Rigorous handling of the eggs during transportation makes the delicate eggs shake and vibrate. This is the most common cause of early embryo death in the fertile eggs. Frequent and violent candling, and turning of the egg by beginners also causes tremendous shake and vibration. You need to handle these eggs gently with mild movements to get better hatch rates.
c. Deficiency of Nutrients.
The death of the embryo is caused by the deficiency of vital nutrients such as Vitamin A and Vitamin E. Your breeding stock should be fed with good quality feed that can provide these nutrients to achieve the best hatching rates.
d. Immature Embryo.
An immature or weak embryo prevents the development of a full-grown embryo. It is important to ensure that your breeding stocks are mature, healthy and well-fed with quality and nutrition-rich food. You can avoid the formation of immature embryos in the eggs you choose for incubation.
e. Choice of Nature.
Sometimes it is simply the choice of nature to stop the development of the embryo. We have no control to enable the growth of the embryo in these conditions. The eggs do not hatch for reasons beyond your control.
3. How do you know if an unhatched egg is alive?
You can check if the unhatched egg is alive or not by using the candling method. You need to flash a bright light right onto the egg in a totally dark environment. In a live egg, you can notice the chick moving around visibly inside the egg.
There is another tip to find out if the chicks are still alive inside an unhatched egg. You can find a pink glow around the edges and a dark area in the centre of the egg.
If the chicks are not alive, you can find the egg to be brownish and muddy inside the shell. You may not be able to find any movement of the chick when you pass the light.
4. How long do you leave unhatched eggs in an incubator?
You need to keep the unhatched eggs in the incubator for another 4 days after the main hatch period of 21 days. If the unhatched eggs do not hatch on the 25th day, you need to plan to move the eggs away. A hen usually abandons the unhatched eggs after the incubation period.
5. Can the chicken eggs hatch early or later than 21 days?
Certain breeds of egg hatch earlier than 21 days when the incubation temperature is too high and the humidity is too low.
Eggs from older breeds are larger in size than normal eggs. These eggs have weak embryos and usually take a longer time to hatch. The low temperatures of the incubator can also cause a delay in the hatching of eggs.
The above guide provides you with the different reasons why the eggs do not hatch even after 21 days of incubation. You also understood the reasons why your egg stops developing into a full-grown embryo. You had a brief idea of how to find if an unhatched egg is alive or not. These detailed causes, tips, and best practices help you to successfully incubate fertile eggs and get a high hatch rate for your chicks.
How to incubate and hatch chicken eggs
Hatching, incubating, and raising your own chickens might be a daunting task. But don’t worry, this guide will teach you how to incubate and hatch chicken eggs. Incubators can be priced from $50 all the way to thousands of dollars for commercial incubators.
You can make your own incubator
You can either buy your own incubators or make your own incubators with a styrofoam box. The first thing you need to know about how to incubate your backyard chicken eggs is that it usually takes 21 days for them to fully incubate. The best eggs to incubate are the ones that are fresh eggs that are not older than 10 days. It’s preferable to bring the eggs to room temperature before incubating.
Getting the incubator set right
The incubator’s temperature needs to be 99.5 degrees Fahrenheit at all times. It is important to keep the temperature at 99.5 degrees as any slight degrees lower or higher can kill the embryo. At the start of the first 18 days, the humidity needs to be kept between 40-50%, and for the final days of hatching, it can be kept between 65-75%.
It’s important to turn your eggs 3 times per day for days 1-18, as it’s important for embryo development. You don’t have to turn the eggs after 18 days. You can also learn how to incubate chicken eggs without an incubator. If you want to make your own incubator you’ll need an insulated box, such as a styrofoam cooler.
You’ll also need a heat source such as an adjustable heating pad or a light bulb. For the humidity, you can use a pan with a sponge in it.
Hatching the eggs
The next step in learning how to incubate and hatch chicken eggs is learning how to hatch them. During the final days before hatching the eggs will move around a lot. It is normal for them to rest awhile and expand their lungs before continuing to hatch.
Do not attempt to help them as it can harm them. Once their born, put them in the brooder at 95 degrees. To make sure they grow up healthy and strong you can also probiotics in their water. This is an optional step, but it will help in establishing good gut flora.
Don’t worry
These are all the steps in how to incubate and hatch chicken eggs. Learning how to incubate and hatch chicken eggs can be daunting and if not all of your eggs are hatched.
Don’t worry!
As a 80% hatch rate is normal, and having a 50% hatch rate for the first time is great. Follow these steps and you’ll learn how to raise your own pet chickens in no time.
Consumers being misled: Are backyard chickens always organic?
There are only a few fulfilling experiences in our lives and one of those experiences is the pleasure of doing things yourself and seeing results out of it. One of these fulfilling experiences is the idea of having your own organic farm in your backyard with a variety of organic plants and not to forget organic poultry.
But is it really possible to start an organic poultry farm in your backyard? Or are your backyard chickens organic?
In this piece, we will look at some of the major aspects of growing organic chicken poultry in your backyard and will try and find answers to all such pertinent questions around the same. To begin with, let us find out more about organic poultry.
What is organic poultry?
The majority of the poultry in the United States makes use of the conventional methods of raising chicken and as such in these conventional methods, the food that is used to feed the chicken is of the conventional nature as well.
More than 95 per cent of the chicken in the US is obtained from conventional poultry methods, most of it from the backyards of conventional households. Until recently it was all good and nobody bothered that much about where the food was coming from. But ever since the rise in the cases of health and hygiene concerns of many food materials, there has been a lot of focus on the source and the manufacture of food.
So what is organic chicken? Organic chicken basically is the chicken that is fed organic food. Apart from that, there are certain other conditions that make your farm an organic poultry farm. In order to be certified with the Organic label, chicken farms are required to follow a strict set of guidelines along with an annual inspection that is conducted by a third-party body that certifies the farms.
These standards that are required to be met include the following:
- The chicken must be raised following the organic methods within two days of their hatching which means as soon as they are ready to be fed, they are to be fed organic food right from the word go.
- Then the next thing that is checked is the feed that they will be eating for the whole of their lives. The chicken is to be fed organic feed for their entire life span.
- The next important thing that you will need to ensure as the owner of an organic farm is the fact that no chemicals drugs or hormone injections are to be given to the chicken during their growth.
- And the most important thing that makes your chicken really organic is the fact that they must have access to outdoors. They must be allowed to roam in the open in nature at least for some duration of the day.
What is an organic feed?
I spoke about organic feed above. So what exactly is organic feed? Organic feed is basically the feed that is made from animal waste or by-products, and other food that is not grown or is subjected to pesticide use. So, basically, organic feed is the feed that is obtained through natural means without any artificial chemicals or hazardous substances being used.
Having seen the prerequisites of an organic poultry farm, let us now find out how chicken can be raised organically.
How do you raise organic chicken?
Raising organic chicken can be a really satisfying experience, given the fact that almost everything that it involves is organic and brings one closer to nature and embracing natural ways of doing farming. When it comes to raising chicken there can be certain things on the basis of which the entire poultry-raising activity can be divided which can be described as under:
1. Choose the right chicken breed
When it comes to raising organic chicken in your backyard, you need to understand that there will be a limitation of space and availability of other predators such as dogs which can hamper the free and outdoor movement of your birds. Also, you need to ensure that you choose the breed based on the requirements you have. If you are raising chicken for eggs, there will be different breeds and if you are raising chicken for meat, the breeds of the chicken would be different. And these different breeds would have to be taken care of and maintained differently.
The egg-laying ones would be lighter in weight and can take flight or jump through your backyard fencing, so you might need to clip their wings. The meat-yielding ones would be heavier and more docile so they would be easier to control and keep but basic hygiene and upkeep are still required.
2. Determine the right number
The next thing that is important to be determined is the number of chickens you need to raise in your backyard. You would not want to overcrowd your backyard with more chickens than you can possibly handle. So, deciding on a number to fulfil your needs is important.
If you are raising organic chicken purely for eggs then a layer of 6 should suffice for a family. However, you will have to take into consideration the fact that your hens would not be laying eggs all around the year. So egg production would decrease. When it comes to meat, you would know how much by when you need and accordingly you can plan your purchase.
3. Buying the chickens
The next step rather is to buy the right breed and the right numbers from the right place. Here we are talking about everything being organic so you will need to make sure you buy the kittens from an authentic place where only organically raised and fed kittens are available. You will also need to consider the cost and the budget and how many you actually need to buy to fulfil your consumption requirement.
A few other things that you need to consider while buying your chicken is, of course, your willingness to wait. You would need to determine if you can wait till the kittens grow to harvest meat from them.
Based on that you can either buy 2-day-old kittens or pullets which are at least 20 weeks or older. Buying the 2-day-old kittens is a cheaper option however it might not be the best one. The 2-day-olds have a high mortality rate and may die if not taken care of properly or while in transit.
While if they survive and are raised organically they grow up to become fit and fine organic chickens, if they fall ill or are not maintained, they die without any warning or chances of recovering. And one very important thing is to buy the chicken at the right time. The best time to buy them is the spring as they would be far happier to find a new home with greenery and new shoots than to find bad weather at a new place.
4. Choosing the right kind of chicken coop
If you want to grow your chicken organically and in the best way, you need to ensure that you provide them with good shelter. Providing your chicken with appropriate shelter or a coop is thus extremely important. These coops can be either very simple homemade arks or custom-made coops. Your organic chicken farm coops should be able to provide the following few things to your chicken which are as follows:
- Protection from bad weather and predators such as foxes and other animals.
- A coop that is large enough to provide enough space can provide them with the right space and enough warmth to each other.
- The coop should be well-ventilated and should not be too much dry air.
- The coop has to be rightly faced to allow the morning sunshine but avoid the direct afternoon sun.
- A part of the coop has to be properly shaded so that the hens can rest when they need to.
You will need to however ensure that you have the right number of coops to accommodate your chicken in your organic farm. You will also need to separate the sick ones from the rest so that all of them do not get sick.
5. Choosing the best chicken feed
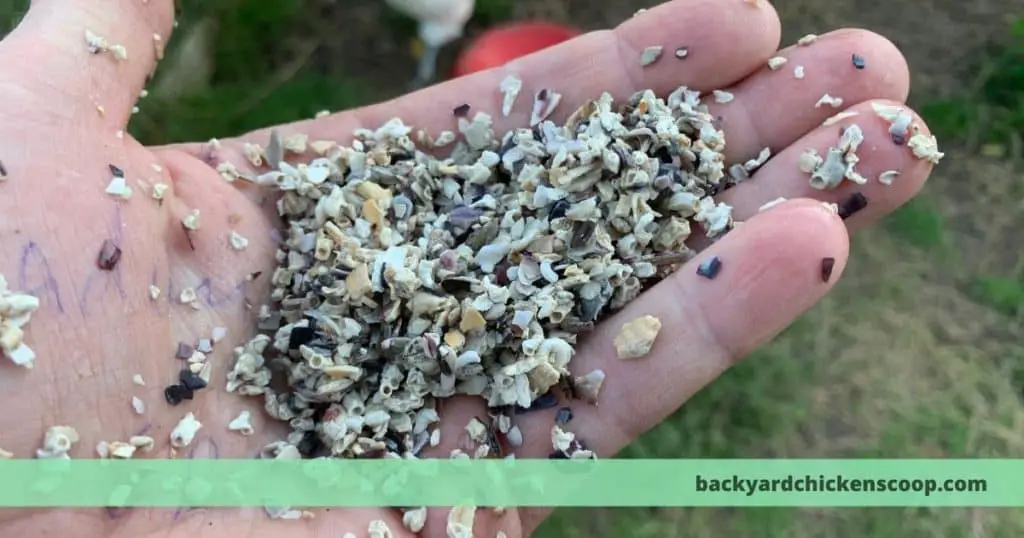
The next and one of the most important of all things is, of course, to choose the best organic chicken feed to feed your chicken. The best organic chicken feed comprises feed made from animal by-products, organically grown food grains and other food materials. This organic feed can also be made from fish and other items such as oysters, grit, etc.
As we mentioned earlier, organic simply means the food that is produced from organic, non-chemical methods. So make sure you provide your chicken with the best feed whatsoever.
6. Providing enough water
This is another important aspect of maintaining an organic chicken farm. You will have to ensure that you maintain a proper and constant supply of clean water for your birds. Your chickens are more than 50 per cent water. So, make sure you give them a proper supply of fresh water to drink. They are unable to perspire and sweat as well and as such, they need water to cool themselves down. If they do not get water, they will probably die.
7. Taking proper care
This is something that you must do without even mentioning it. I have had instances where not paying heed to early signs has led to the death of many of my birds. Hence, it is important that you do not neglect any signs of sickness. If you find early signs of sickness in any of your birds, just examine them carefully. Opt for some natural and home remedies at first to avoid any kind of chemical or antibiotic intake. If that, however, does not work, then the next step would be to ask an expert to visit.
That covers pretty much how you can raise chickens on an organic farm. All of this revolves around the use of organic methods, feed and products during the entire life cycle of your chicken and obviously some basic care that involves feeding them little and in small intervals, clean shelters and coops, proper water supply, and regular monitoring to recognize any sickness.
You must have by now observed the importance of organic feed in organic chicken farming. How is organic feed different from the non-organic feed?
Let us see the differences in the next section.
Difference between organic and non-organic chicken feed.
By now you should be able to tell the differences yourself, there are some very prominent differences between the two.
Organic feed means that the grains are naturally grown and are not grown from genetically modified seeds or are not contaminated in any way by the use of pesticides or insecticides. However, these organic feeds can be allowed to be spiked with non-organic nutrients such as minerals, vitamins, amino acids, etc. However, there can be no use of drugs, antibiotics or any kind of hormones in the feeds.
Organic chicken feed obviously is far more beneficial for the health of the chicken and obviously to the end consumers of chicken who are human beings. You are what you eat. So if the meat that you eat is organic, you are surely going to reap the benefits of it.
One major difference between organic feed and conventional feed is, of course, the price. Organic feed is comparatively more expensive than conventional feed because of the costs of production of such feed and making it commercially available and viable.
Having seen the differences, let’s find out which organic chicken feed is the best.
You can however do your own research and pick the best one that suits your chicken’s needs and requirements.
If you want to learn more about raising organic chickens you should read this amazing post over at backyardchickenscoop.com…